
How Do You Winterize Outdoor Cold Storage Units? IcefoxEquipment Field Guide
Article Plans
Winterizing an outdoor cold storage unit means protecting the refrigeration system, power connection, door hardware, drainage path, walking surface, and stored inventory before freezing weather arrives. IcefoxEquipment supports short-term and long-term outdoor refrigeration projects with 24/7 assistance, emergency deployment, and equipment configurations designed for construction, renovation, seasonal storage, and urgent cold-chain needs.
A cold storage unit can still fail in winter. Low outdoor temperatures do not eliminate compressor cycling, frost buildup, electrical demand, blocked drains, damaged seals, or unsafe access. In our experience, the most expensive winter failures usually begin with 1 overlooked utility connection or a door that is repeatedly left open during loading.
Quick Answer: Winterize an outdoor cold storage unit by confirming its required 208–230V or 220V electrical service, inspecting door seals and drains, removing frost from coils, protecting the cable, stabilizing access, limiting door openings, and documenting a 24/7 response plan before freezing weather begins.
Quick Facts
- IcefoxEquipment offers customer and emergency support 24 hours a day, 7 days a week.
- Standard refrigerated trailers are documented at 34°F–41°F.
- Standard freezer trailers are documented at 0°F to -10°F.
- Some outdoor freezer models offer settings of 35°F, 0°F, -10°F, and -20°F.
- Refrigeration-trailer electrical demand may range from 30 amps to 60 amps, depending on the delivered equipment.
- Projects longer than 6, 12, or 24 months may qualify for preferred pricing.
Key Takeaways
- Verify the delivered unit’s data plate because electrical requirements may be 30 amps, 40 amps, or 40–60 amps.
- Inspect doors, drains, coils, cables, and walking surfaces before the first 1 hard freeze.
- Keep door openings brief because repeated access adds moisture that can become frost at 0°F or below.
- Maintain a written 24/7 power-failure and temperature-response procedure.
- Do not choose winter equipment by rental price alone; a $1,295–$2,195 trailer still needs safe power, placement, access, and maintenance.
What Does Winterizing an Outdoor Cold Storage Unit Include?
Winterization should cover at least 5 systems: refrigeration, electrical power, doors, drainage, and safe access. IcefoxEquipment’s winter guidance specifically identifies refrigeration systems, power supplies, doors, drains, and stored products as areas that need attention during extreme weather.
The work starts before temperatures fall. A pre-winter inspection should confirm that the selected unit can hold its required range, whether that is 34°F–41°F for refrigerated storage or 0°F to -10°F for standard frozen storage.
Outdoor refrigeration is not simply a metal box sitting in cold air. The unit still has controls, fans, coils, heaters, wiring, seals, drains, and mechanical components that must operate through repeated temperature swings over each 24-hour period.
Our opinion is direct: skip the cosmetic inspection if time is tight and spend that time on the electrical connection, door seal, drain path, and evaporator coil. Those 4 areas create more operational risk than scratches on the exterior skin.
How Do You Verify Winter Electrical Service?
Confirm the voltage, phase, amperage, connector, cable length, breaker, and generator compatibility for the exact delivered unit. Uploaded setup instructions list 220V, single-phase power at 40–60 amps, with 50–60 amps preferred when the breaker trips repeatedly.
A separate power guide lists 220V, single phase, 40 amps for 12-foot freezer trailers and 20-foot refrigerated trailers. IcefoxEquipment also lists 208–230V, single-phase, 30-amp service for certain standard outdoor freezer models, so the equipment data plate must control the final connection.
Never assume that 1 trailer can replace another on the same circuit. Two units with similar exterior dimensions may use different compressors, controls, defrost systems, plugs, or startup loads.
The uploaded installation guide specifies a 50-foot, 6-AWG extension cable when an approved rented cord is not supplied. A licensed commercial electrician should make the final connection and protect the cable from snowplows, standing water, vehicle tires, sharp metal edges, and pedestrian traffic.
A winter generator should be sized for startup demand, not only normal running load. IcefoxEquipment’s electrical checklist notes that refrigeration equipment may operate at 120V, 208V, 230V, or 460V, depending on the unit and capacity.
How Do You Control Frost and Ice Buildup?
Control frost by reducing moisture entry, keeping doors closed, inspecting gaskets, clearing coils, and confirming that the defrost system is operating. IcefoxEquipment has a dedicated resource on preventing frost buildup in temporary walk-in freezers, which shows that winter frost is an operating issue, not merely a housekeeping issue.
The uploaded installation instructions identify 3 practical actions when the system struggles: remove ice buildup from the coils, keep the doors closed as often as possible, and verify that the electrical supply can provide up to 60 amps when required.
Warm, damp air enters each time the door opens. At 0°F, -10°F, or -20°F, that moisture can freeze on the floor, evaporator, door frame, shelving, and product packaging.
Do not attack thick ice with sharp tools. Damaging 1 coil, drain pan, refrigerant line, floor seam, or door gasket can turn routine frost removal into an emergency service call.
The setup guide also notes that a compressor may cycle 3 times before running on the 4th cycle and that fans may activate near 55°F during a normal process. Staff should understand the unit’s actual sequence before assuming that a temporary pause means the system has failed.
How Should Doors, Seals, and Loading Procedures Be Prepared?
Inspect the door gasket, latch, hinges, threshold, closer, interior release, and frame before winter operation. A single 1-inch gap or damaged section can admit moisture, create frost, and force the refrigeration system to run longer.
Create a loading procedure that limits the number and duration of door openings. A 2-person loading team is often more efficient than one person repeatedly walking between the building and trailer while the door remains open.
Stage products before opening the unit. If 20 cases can be transferred in one organized movement rather than 5 separate trips, the door remains open for less time and less humid air enters.
IcefoxEquipment outdoor freezer models may be set at 35°F, 0°F, -10°F, or -20°F, so the same door-opening habit can produce very different frost conditions depending on the selected temperature.
Where the cold storage unit is butted against a building, protect the connection from snow, rain, and wind. IcefoxEquipment notes that a butted outdoor configuration can reduce wear because the door is less exposed to outdoor elements.
How Do You Protect Drains, Condensate, and the Surrounding Ground?
Keep every drain and runoff path open before temperatures fall below 32°F. Standing water near a freezer, stair, ramp, cable, or loading area can freeze into a hard, nearly invisible walking hazard.
Inspect the drain outlet at least 1 time per shift during severe weather when the unit is producing visible condensate or undergoing defrost cycles. The drain must not discharge where water can refreeze beneath a doorway or access platform.
Snow should be removed without piling it against the condenser, door, vent, electrical panel, or emergency exit. Maintain at least the manufacturer-required working clearance around mechanical equipment and preserve 24/7 service access.
For indoor-style walk-in equipment, IcefoxEquipment references approximately 2 inches of perimeter airflow and at least 6 inches above the unit. Outdoor equipment has different clearance requirements, but the same principle applies: blocked airflow reduces performance.
Use deicing products only when they are compatible with the unit, floor, ramp, nearby food-handling environment, and drainage rules. Applying 1 unsuitable chemical repeatedly can corrode metal, damage seals, or create residue that is tracked inside.
By the Numbers: Winter Cold Storage Planning
| Planning item | Sourced figure |
|---|---|
| Refrigerated operating range | 34°F–41°F |
| Standard freezer range | 0°F to -10°F |
| Additional listed freezer setting | As low as -20°F |
| Trailer electrical service | 220V, 40–60 amps |
| Standard-model electrical service | 208–230V, 30 amps |
| Recommended cable | 50 feet, 6 AWG |
| Emergency support | 24/7 |
These 7 figures should be confirmed during the site walk, not after delivery. The delivered unit, project temperature, local climate, loading frequency, utility service, and backup-power plan determine the final winter setup.
What Does Winterized Cold Storage Cost?
A 12-foot refrigerated trailer is listed at $1,295–$2,195, while a 20-foot refrigerated trailer is listed at $1,495–$2,395. A 20-foot freezer trailer is also listed at $1,495–$2,395.
Larger ground-level options include a 20-foot refrigerated container at $2,495–$2,995 and a 40-foot refrigerated container at $2,995–$3,995.
The rental rate is only 1 part of winter cost. Your total may also include delivery, pickup, electrical work, generator rental, fuel, cable protection, snow removal, monitoring, stairs, ramps, service calls, permits, taxes, and site restoration.
Projects exceeding 6, 12, or 24 months may qualify for preferred pricing. For a long winter project, we recommend comparing the full seasonal cost rather than choosing the lowest monthly equipment line.
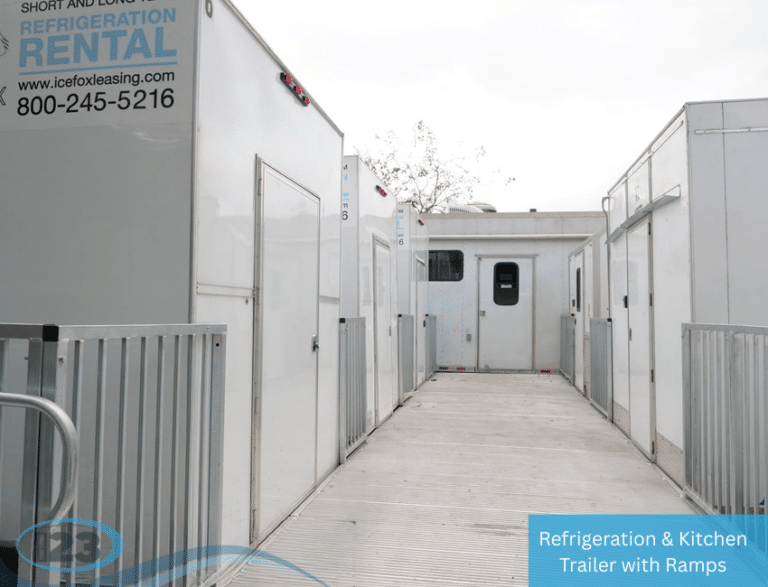
Ramp access can be significant. Uploaded ramp guidance lists a 3-month minimum, pricing beginning at $9,995, setup at $4,995–$6,995, and teardown at $3,995–$5,995.
How Does IcefoxEquipment Prepare a Unit for Winter Deployment?
IcefoxEquipment’s winter cold-storage guidance emphasizes adapting refrigeration equipment, power, doors, drains, and product-handling procedures for extreme weather. The following 7-step process translates those priorities into a practical site workflow.
- Confirm the temperature. Select 34°F–41°F, 0°F to -10°F, or another approved equipment setting.
- Verify the power. Match the delivered unit to 30, 40, or 40–60 amps and the correct voltage and phase.
- Inspect the door. Check 1 complete door assembly, including gasket, hinges, latch, closer, threshold, and interior release.
- Clear the coils. Remove snow, debris, and frost without damaging 1 refrigerant line or fin section.
- Protect the drain. Confirm that defrost water can flow without freezing at the entrance.
- Stabilize access. Secure the stair or ramp and maintain a cleared path throughout each 24-hour operating period.
- Test the response plan. Confirm the 24/7 contact list, generator procedure, temperature alarm, and product-transfer plan.
What Common Winterization Mistakes Cause Failures?
Mistake 1: Assuming Cold Weather Reduces the Need for Refrigeration
A 0°F outdoor day does not guarantee correct product temperature. Sun exposure, cycling controls, door openings, uneven airflow, and changing weather can still create damaging temperature variation.
Mistake 2: Using the Wrong Electrical Circuit
A unit requiring 40–60 amps may trip or fail when connected to a smaller circuit. Verify the data plate and use a licensed electrician instead of relying on a similar-looking plug.
Mistake 3: Letting Snow Block the Condenser
Even 1 snowbank can restrict airflow, hide damage, obstruct service access, or direct meltwater toward electrical equipment.
Mistake 4: Ignoring Frost Until the Door Sticks
Removing light frost during 1 scheduled inspection is safer than forcing a frozen door, chipping thick ice, or stopping operations for emergency repair.
Mistake 5: Leaving the Cable Unprotected
A 50-foot, 6-AWG cable can still be damaged by plows, forklifts, delivery trucks, standing water, or sharp edges when it is routed poorly.
Winterization Decision Checklist
- ☐ Confirm the required range: 34°F–41°F, 0°F to -10°F, or another approved setting.
- ☐ Match the unit to 208–230V or 220V power.
- ☐ Verify whether the unit requires 30 amps, 40 amps, or 40–60 amps.
- ☐ Protect any 50-foot, 6-AWG cable from traffic and water.
- ☐ Inspect 1 full door assembly and replace damaged seals.
- ☐ Clear snow and frost from coils without using sharp tools.
- ☐ Keep drains open before temperatures fall below 32°F.
- ☐ Maintain a cleared, illuminated access route 24/7.
- ☐ Ask about preferred pricing for projects exceeding 6, 12, or 24 months.
- ☐ Call 800-245-5216 with the site ZIP code, temperature, unit size, power, and rental duration.
Request a Quote
Request a quote today for industry-leading refrigeration, modular facilities, and mobile equipment solutions. Ice Fox Equipment provides rapid deployment, flexible rental and leasing options, and dependable support for construction, healthcare, food service, emergency response, and industrial operations. Contact our team now for a customized, no-obligation quote.

Frequently Asked Questions
Yes. IcefoxEquipment supplies outdoor refrigeration trailers, freezer trailers, containers, and modular cold-storage systems for short-term and long-term needs. Its equipment may support ranges from 34°F–41°F down to -10°F, while certain listed models offer settings as low as -20°F. Final configuration depends on availability and project requirements.
The required service depends on the exact unit. Uploaded instructions list 220V, single phase, 40–60 amps, while another guide lists 220V and 40 amps for certain trailers. IcefoxEquipment also lists 208–230V, single-phase, 30-amp service for some standard outdoor freezer models, so always verify the data plate.
Published planning figures list a 12-foot refrigerated trailer at $1,295–$2,195, a 20-foot refrigerated or freezer trailer at $1,495–$2,395, and a 40-foot refrigerated container at $2,995–$3,995. Winter costs can also include power, generators, cables, access systems, snow management, delivery, monitoring, and site work.